golang 快速入门教程小记

安装(Linux 环境)

按以下命令安装:

1
2
3
4
5
6
# 下载安装包
wget https://go.dev/dl/go1.17.5.linux-amd64.tar.gz
# 解压
rm -rf /usr/local/go && tar -C /usr/local -xzf go1.17.5.linux-amd64.tar.gz
# 设置环境变量
export PATH=$PATH:/usr/local/go/bin

检查是否安装成功,输出版本后表示安装成功。

1
2
$ go version
go version go1.17.5 linux/amd64

写 hello world

创建项目:

1
cd && mkdir hello && cd hello

初始化依赖:

1
2
$ go mod init example/hello
go: creating new go.mod: module example/hello

创建 hello.go 文件,贴入代码:

1
2
3
4
5
6
7
package main

import "fmt"

func main() {
fmt.Println("Hello, World!")
}

执行代码:

1
2
$ go run .
Hello, World!

好了,golang之路已开启。

调用三方包

引入 rsc.io/quote 三方包:

1
2
3
4
5
6
7
8
9
package main

import "fmt"

import "rsc.io/quote"

func main() {
fmt.Println(quote.Go())
}

添加新的模块依赖和 sum 值,需要联网:

1
2
3
$ go mod tidy
go: finding module for package rsc.io/quote
go: found rsc.io/quote in rsc.io/quote v1.5.2

跑一跑:

1
2
$ go run .
Don't communicate by sharing memory, share memory by communicating.

再多整点代码

接下来我们看看怎么写一个其他人可以使用的模块,首先创建一个新项目 greetings

1
cd && mkdir greetings && cd greetings

初始化:

1
2
$ go mod init example.com/greetings
go: creating new go.mod: module example.com/greetings

创建文件 greetings.go,加入代码:

1
2
3
4
5
6
7
8
9
10
11
12
13
14
15
16
17
18
19
20
21
22
23
24
25
26
27
28
29
30
31
32
33
34
35
36
37
38
39
40
41
42
43
44
45
46
47
48
49
50
51
52
53
54
55
56
57
package greetings

import (
"errors"
"fmt"
"math/rand"
"time"
)

// Hello returns a greeting for the named person.
func Hello(name string) (string, error) {
// If no name was given, return an error with a message.
if name == "" {
return name, errors.New("empty name")
}
// Create a message using a random format.
message := fmt.Sprintf(randomFormat(), name)
return message, nil
}

// Hellos returns a map that associates each of the named people
// with a greeting message.
func Hellos(names []string) (map[string]string, error) {
// A map to associate names with messages.
messages := make(map[string]string)
// Loop through the received slice of names, calling
// the Hello function to get a message for each name.
for _, name := range names {
message, err := Hello(name)
if err != nil {
return nil, err
}
// In the map, associate the retrieved message with
// the name.
messages[name] = message
}
return messages, nil
}

// Init sets initial values for variables used in the function.
func init() {
rand.Seed(time.Now().UnixNano())
}

// randomFormat returns one of a set of greeting messages. The returned
// message is selected at random.
func randomFormat() string {
// A slice of message formats.
formats := []string{
"Hi, %v. Welcome!",
"Great to see you, %v!",
"Hail, %v! Well met!",
}

// Return one of the message formats selected at random.
return formats[rand.Intn(len(formats))]
}

为了引入上面写好的模块并调用,我们再创建个项目 hello

1
cd .. && mkdir hello && cd hello

初始化:

1
2
$ go mod init example.com/hello
go: creating new go.mod: module example.com/hello

创建文件 hello.go,加入代码:

1
2
3
4
5
6
7
8
9
10
11
12
13
14
15
16
17
18
19
20
21
22
23
24
25
26
27
28
package main

import (
"fmt"
"log"

"example.com/greetings"
)

func main() {
// Set properties of the predefined Logger, including
// the log entry prefix and a flag to disable printing
// the time, source file, and line number.
log.SetPrefix("greetings: ")
log.SetFlags(0)

// A slice of names.
names := []string{"Gladys", "Samantha", "Darrin"}

// Request greeting messages for the names.
messages, err := greetings.Hellos(names)
if err != nil {
log.Fatal(err)
}
// If no error was returned, print the returned map of
// messages to the console.
fmt.Println(messages)
}

接下来编辑 example.com/hello 模块使用本地 example.com/greetings 模块,首先在 hello 目录执行:

1
$ go mod edit -replace example.com/greetings=../greetings

同步依赖:

1
2
$ go mod edit -replace example.com/greetings=../greetings
go: found example.com/greetings in example.com/greetings v0.0.0-00010101000000-000000000000

最后执行代码:

1
2
$ go run .
map[Darrin:Hail, Darrin! Well met! Gladys:Hi, Gladys. Welcome! Samantha:Hail, Samantha! Well met!]

添加单元测试

创建单测文件 greetings_test.go,在 go 中单测文件名是以 _test.go 结尾的,添加代码:

1
2
3
4
5
6
7
8
9
10
11
12
13
14
15
16
17
18
19
20
21
22
23
24
25
26
package greetings

import (
"testing"
"regexp"
)

// TestHelloName calls greetings.Hello with a name, checking
// for a valid return value.
func TestHelloName(t *testing.T) {
name := "Gladys"
want := regexp.MustCompile(`\b`+name+`\b`)
msg, err := Hello("Gladys")
if !want.MatchString(msg) || err != nil {
t.Fatalf(`Hello("Gladys") = %q, %v, want match for %#q, nil`, msg, err, want)
}
}

// TestHelloEmpty calls greetings.Hello with an empty string,
// checking for an error.
func TestHelloEmpty(t *testing.T) {
msg, err := Hello("")
if msg != "" || err == nil {
t.Fatalf(`Hello("") = %q, %v, want "", error`, msg, err)
}
}

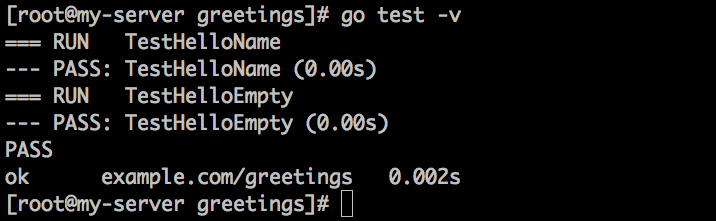
执行单测命令 go test -v,查看结果:

xxx

编译安装应用

在 hello 目录执行 go build 命令可将 hello.go 编译为二进制可执行文件 hello

1
$ go build

然后我们运行一下试试:

1
2
$ ./hello
map[Darrin:Great to see you, Darrin! Gladys:Hail, Gladys! Well met! Samantha:Hail, Samantha! Well met!]

接下来我们安装它来实现全局运行,首先可以通过命令查看系统当前的 go app 安装路径:

1
$ go list -f '{{.Target}}'

注意这个是 go app 的安装路径,不是 go 语言的安装路径。

可通过以下命令把 go app 安装路径配置到环境变量中:

1
$ export PATH=$PATH:/path/to/your/install/directory

也可以通过以下命令来修改当前 go app 安装路径:

1
$ go env -w GOBIN=/path/to/your/bin

更新好后执行:

1
$ go install

这样就完成了应用的编译安装。

接下来可以在你的任意目录执行 hello 命令:

xxx

好了,就介绍这么多,其实都是按照官方文档一步一步操作来的。

参考

Tutorial: Get started with Go